BY ELAINA MERCATORIS
News Editor
[email protected]

The aroma in the kitchen gave off the perfect fall feeling.
It was cold and raining, but the smell alone brought back memories of apple trees and piles of leaves.
I had just baked apples.
People often overlook just baking apples.
We make apple pies, apple crisps, applesauce, everything apple, apple, apple.
But we always forget to just bake them a little.
Not only do the apples come out of the oven softened and flavorful, the process involves very little effort or time.
The inarguably most trying task is coring the apples without an apple corer.
As a child, I was spoiled by our apple peeler-corer-slicer.

It was, without a doubt, my favorite kitchen utensil.
I stood over my four apples (two Granny Smith and two Red Delicious) with a knife.
Two knives, actually: a paring knife and a larger chef’s knife.
Of course I wanted the apples to look aesthetically pleasing and I feared the larger knife would cut too much of the apple, even though it was without a doubt the sharper of the two.
In the end, I went with the paring knife.
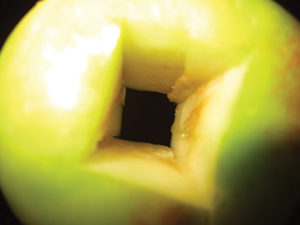
I stabbed it into the apple, about a centimeter outside the stem and then wiggled it around until I could manage to get the knife out of the apple.
This method isn’t the safest of methods; therefore use extreme caution unless you plan on making a trip to the emergency room for some stitches.
Don’t hold the apple in the direction of the knife.
And when you stab the apple, don’t extend your arm and make it dramatic.

Just place the tip of the knife where you want the incision and then carefully press down.
After I made four stabs in the top of an apple to form a square, I did the same with the bottom of the apple.
Then I just pushed the core out with my thumb.
With the difficult, most time-consuming part behind me, I preheated the oven to about 425 degrees Fahrenheit.
My mom’s recipe says to peel the apples one inch down from the top, so I just laid each apple on its side and cut a little skin outside of the square for each of the four sides on the top.
Then it was time to make the stuffing.
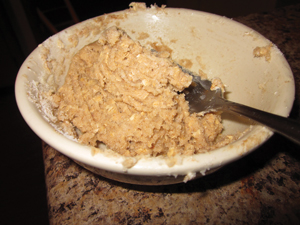
First, I melted three tablespoons of butter in the microwave for about ten seconds.
Then I added oatmeal, sugar and cinnamon.
Believe it or not, I chose to make the healthier version of this recipe.
The consistency of the stuffing is like a heavy paste – very thick and sticky.

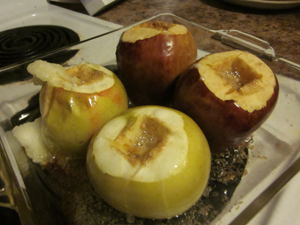
Place the apples in a baking dish and spoon (or fork) the butter mixture into the cores of the apple.
Put them in the oven and set the timer for 20 minutes.
Allow the smell to permeate throughout the house, and enjoy it while it lasts.
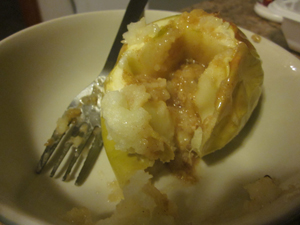
When I pulled them out of the oven, one of the apples had practically exploded and the circle-shape caved in on one side.
That’s the one I ate.
It was deliciously tart and sweet at the same time because of the nature of Granny Smith apples and the sugary stuffing.
The fruit softens and the stuffing permeates through the rest of the apple.
This recipe takes all of a half hour, so try it.
The apples are delicious and the smell is almost better.


